Easy Homemade Pizza Dough: Master Your Perfect Crispy & Chewy Crust
Imagine biting into a slice of pizza where the crust is perfectly golden, audibly crispy on the outside, yet wonderfully soft and chewy on the inside. This isn't just a dream reserved for your favorite pizzeria; it's an achievable reality right in your own kitchen. The true magic of a memorable pizza lies not just in its toppings, but fundamentally in its foundation: the dough. Mastering a
homemade pizza dough recipe is a culinary game-changer, opening up a world of fresh, authentic flavors that simply can't be matched by store-bought alternatives.
While the idea of working with yeast and kneading dough might seem daunting at first, rest assured, it���s a surprisingly straightforward process that anyone can master. With just a handful of basic ingredients and a little patience, you'll soon be crafting artisanal pizzas that impress family and friends alike. This comprehensive guide will walk you through every step, from selecting the finest flours to achieving that ideal rise, ensuring your homemade pizza dough delivers a crust that’s both deliciously crispy and satisfyingly chewy.
Why Master Your Homemade Pizza Dough? Beyond the Basics
The primary reason to embrace a homemade pizza dough recipe is, quite simply, the unparalleled taste and texture. Commercial pizza bases often lack depth of flavor and can result in a dry, cardboard-like crust. Homemade dough, on the other hand, develops complex flavors through fermentation and allows you to control the exact balance of crispiness and chewiness.
Beyond flavor, making your own dough offers several advantages:
*
Freshness You Can Taste: Nothing beats the aroma and taste of freshly prepared dough.
*
Control Over Ingredients: You know exactly what goes into your food, avoiding unwanted additives or preservatives.
*
Customization: Adjust ingredients like olive oil or sugar to fine-tune the flavor profile and texture to your preference.
*
Therapeutic Process: The act of kneading can be incredibly satisfying and a wonderful stress reliever.
*
Cost-Effective: Making dough from scratch is significantly cheaper than buying pre-made bases.
Once you experience the difference, you'll undoubtedly agree that investing a little time in a quality homemade pizza dough recipe is more than worth the effort.
Essential Ingredients for the Perfect Crust
Creating an exceptional pizza crust begins with understanding the role of each ingredient. While simple, the quality and combination of these elements are crucial. Here's a breakdown of what you'll need for your homemade pizza dough recipe:
*
Flour: The Foundation of Texture
*
Tipo ‘00’ Flour: This is the gold standard for authentic Italian pizza. Finer ground than standard all-purpose flour, it has a moderate protein content that creates a remarkably smooth, elastic dough with a tender crumb. It's fantastic for achieving that classic Neapolitan-style crust. Look for it in Italian delis or specialty aisles.
*
Strong White Bread Flour: If Tipo ‘00’ isn't available, a strong white bread flour is your next best bet. "Strong" indicates a higher protein (gluten) content, typically 12-14%. This gluten is essential for developing the elasticity and structure needed for a robust, chewy crust.
*
Finely Ground Semolina Flour (Optional but Recommended): Adding a portion of semolina (around 20% of the total flour) can introduce a beautiful golden hue, a slightly coarser texture, and a pleasant, subtle crunch to your crust. It also helps in achieving a crisper finish.
*
Fine Sea Salt: Elevating Flavor and Structure
Salt isn't just for seasoning; it plays a vital role in controlling yeast activity and strengthening the gluten network, leading to a more flavorful and structured dough. Use fine sea salt for even distribution.
*
Dried Yeast: The Engine of the Rise
You'll typically use instant or active dry yeast. Dried yeast is what gives your dough its lift, creating those desirable airy pockets in the crust. The sugar in the recipe acts as food for the yeast, helping it activate and thrive.
*
Golden Caster Sugar: Fueling the Yeast and Enhancing Browning
Just a small amount of sugar works wonders. It provides immediate sustenance for the yeast, helping it become active. Furthermore, it contributes to a beautiful golden-brown crust during baking by aiding in caramelization.
*
Extra Virgin Olive Oil: For Flavor, Tenderness, and Elasticity
Good quality extra virgin olive oil adds richness and a distinct Mediterranean flavor to your dough. It also contributes to the dough's elasticity, making it easier to work with, and helps create a more tender, less brittle crust.
*
Lukewarm Water: The Catalyst
The temperature of your water is critical. Lukewarm water (around 35-40°C or 95-105°F) is ideal for activating the yeast without killing it (if too hot) or hindering its activity (if too cold).
Flour Power: Pro Tips for Incredible Homemade Pizza Dough Texture can provide even more insights into choosing the right flour for your desired crust.
Step-by-Step Guide to Your Homemade Pizza Dough Recipe
Let's get down to the practical steps of bringing your homemade pizza dough to life.
Ingredients (Yields 6-8 medium pizzas):
- 1kg strong white bread flour or Tipo ‘00’ flour (or 800g of either plus 200g finely ground semolina flour for added texture)
- 1 teaspoon fine sea salt
- 2 x 7g sachets of dried yeast
- 1 tablespoon golden caster sugar
- 4 tablespoons extra virgin olive oil
- 650ml lukewarm water
Method:
-
Prepare Your Dry Ingredients: On a clean, flour-dusted work surface, sieve your chosen flour/s and salt together. Sifting aerates the flour and removes any lumps, ensuring a smoother dough. Create a generous well in the center of your flour pile.
-
Activate the Yeast: In a measuring jug, combine the lukewarm water, dried yeast, golden caster sugar, and extra virgin olive oil. Stir gently and let it sit for 5-10 minutes. You should see a frothy layer forming on top, indicating the yeast is active and ready to work. If no froth appears, your yeast might be expired, or your water temperature was off; it’s best to start again.
-
Combine and Bring Together: Pour the activated yeast mixture into the well of your flour. Using a fork, gradually draw the flour from the inner edges of the well into the liquid, swirling it gently. Continue mixing, incorporating more flour from the sides until the mixture starts to come together into a shaggy mass.
-
Knead for Elasticity: Once the mixture forms a rough ball, lightly flour your hands and begin to work the remaining flour into the dough. Knead vigorously for 10-15 minutes. This is a crucial step! Kneading develops the gluten network, transforming the sticky mass into a smooth, elastic, and springy dough. You'll know it's ready when it feels pliable and passes the "windowpane test" – you should be able to stretch a small piece of dough thinly enough to see light through it without tearing.
-
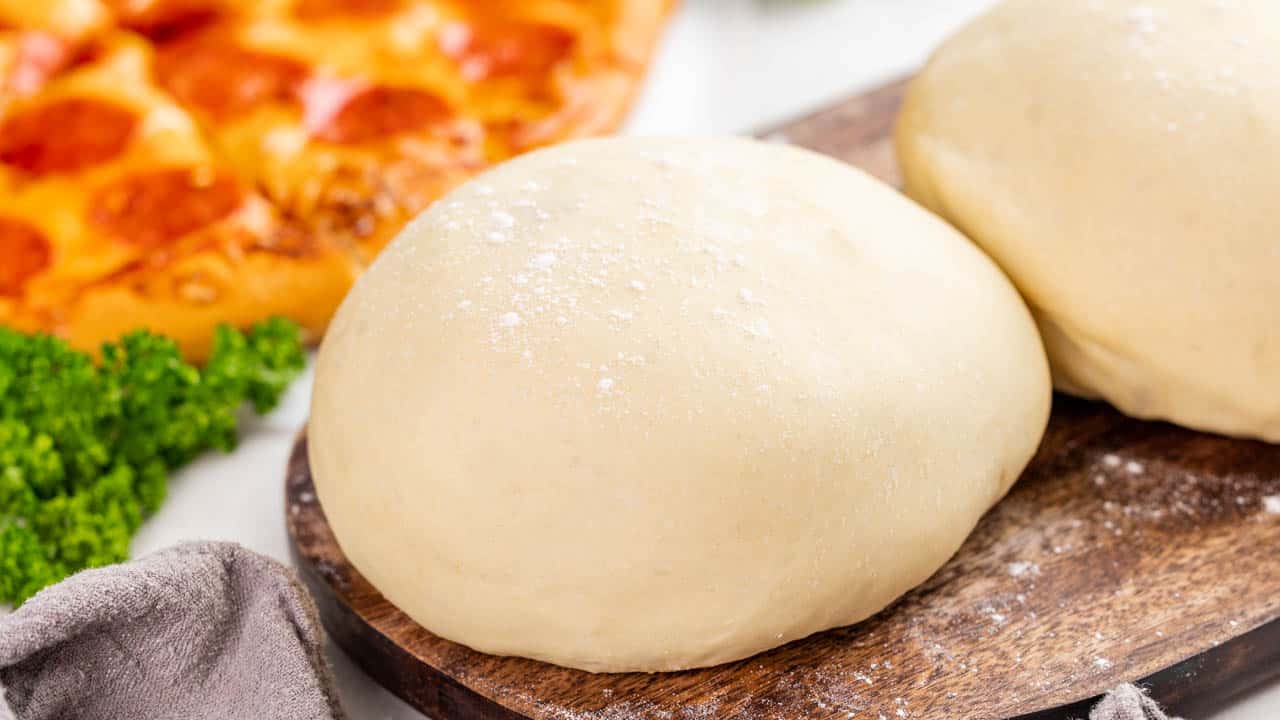
First Rise (Proofing): Shape the kneaded dough into a ball and place it in a large, lightly oiled bowl. Dust the top of the dough with a little flour. Cover the bowl with a damp cloth or clingfilm to prevent drying out, and place it in a warm, draft-free room. An unheated oven with the light on, or near a sunny window, works well. Let it rise for about 1 to 1.5 hours, or until it has doubled in size. This fermentation process is essential for flavor development and a light texture.
-
Knocking Back and Storage: Once doubled, gently remove the dough to a lightly floured surface. Knead it briefly for a minute or two to "knock back" the air. This redistributes the yeast, evens out the temperature, and helps create a finer crumb structure. At this point, you can use the dough immediately, or wrap it tightly in clingfilm and store it in the fridge for up to 3 days, or freeze it for up to 3 months. If refrigerating, remember to bring it back to room temperature for about an hour before using.
-
Portion and Prep for Shaping: If using immediately, divide the dough into 6-8 equal portions, forming each into a neat ball. For best results, allow these individual dough balls to rest, covered, for another 15-20 minutes before shaping. This relaxes the gluten, making the dough much easier to roll or stretch.
Achieving the Perfect Bake: Crispy, Chewy, and Delicious
Now that you have your perfectly prepared homemade pizza dough, the baking process is where its true potential is unleashed.
1.
Preheat Aggressively: A screaming hot oven is paramount for a truly spectacular crust. Preheat your oven to its maximum temperature – typically 250°C (500°F) or even higher if your oven allows, with the fan setting if available. If you have a pizza stone or steel, place it in the oven during preheating and allow it to heat for at least 45-60 minutes. This mimics a professional pizza oven's intense, even heat, creating that coveted crispy base.
2.
Shaping Your Crust: Take a dough ball and coat it lightly in flour. Start by pressing it out from the center into a flat disc, leaving a slightly thicker rim for the crust. Gently stretch and turn the dough, using gravity to help thin it out. Avoid using a rolling pin too much, as it can push out too many air bubbles, resulting in a denser crust. Aim for about 0.5cm thickness in the center, ensuring no holes appear.
3.
Topping and Baking: Once shaped, transfer your dough to a piece of parchment paper or a lightly floured pizza peel. Add your sauce, cheese, and toppings quickly. Slide the pizza onto your preheated stone or steel.
4.
Monitor and Rotate: Bake for 8-15 minutes, depending on your oven and desired crispness. Keep an eye on the crust; it should puff up, brown beautifully, and become irresistibly crispy. If one side is browning faster, rotate the pizza halfway through.
Conclusion
Embarking on the journey of making your own homemade pizza dough recipe is an incredibly rewarding endeavor. It transforms the act of making pizza from a mere meal preparation into a delightful culinary adventure. From the tactile pleasure of kneading to the intoxicating aroma of freshly baked bread, every step brings you closer to a truly exceptional meal. With the tips and techniques outlined in this guide, you’re now equipped to create a pizza crust that is consistently crispy, delightfully chewy, and bursting with authentic flavor. So, gather your ingredients, clear your counter, and get ready to experience the profound satisfaction of crafting the perfect pizza from scratch. Your taste buds (and your guests) will thank you!